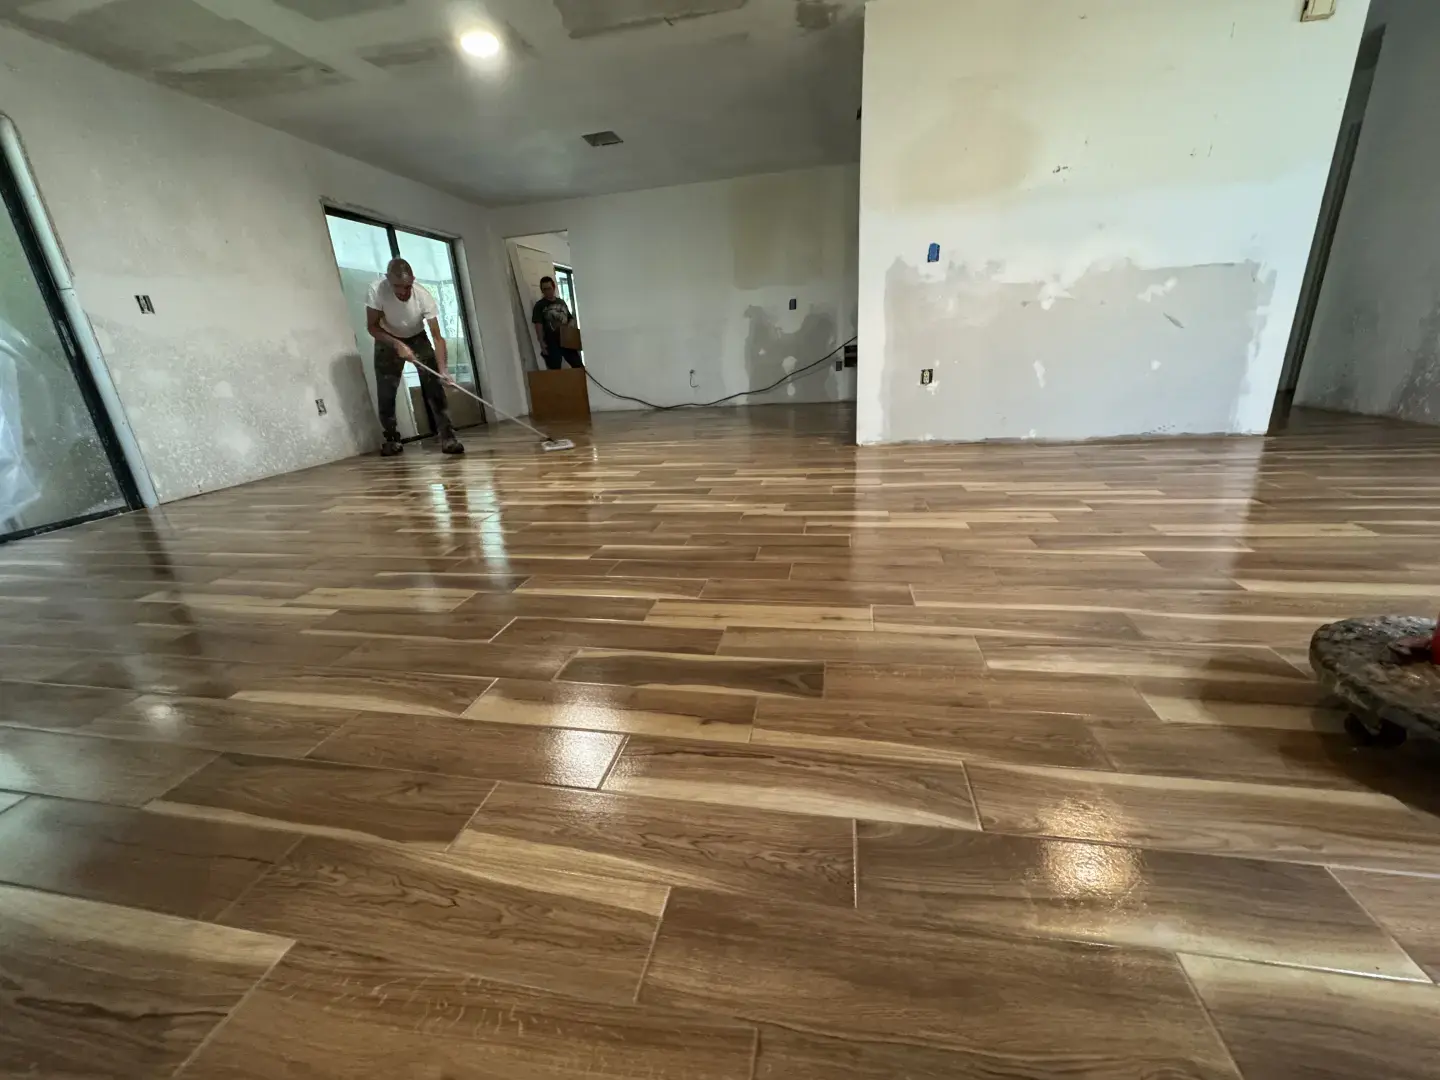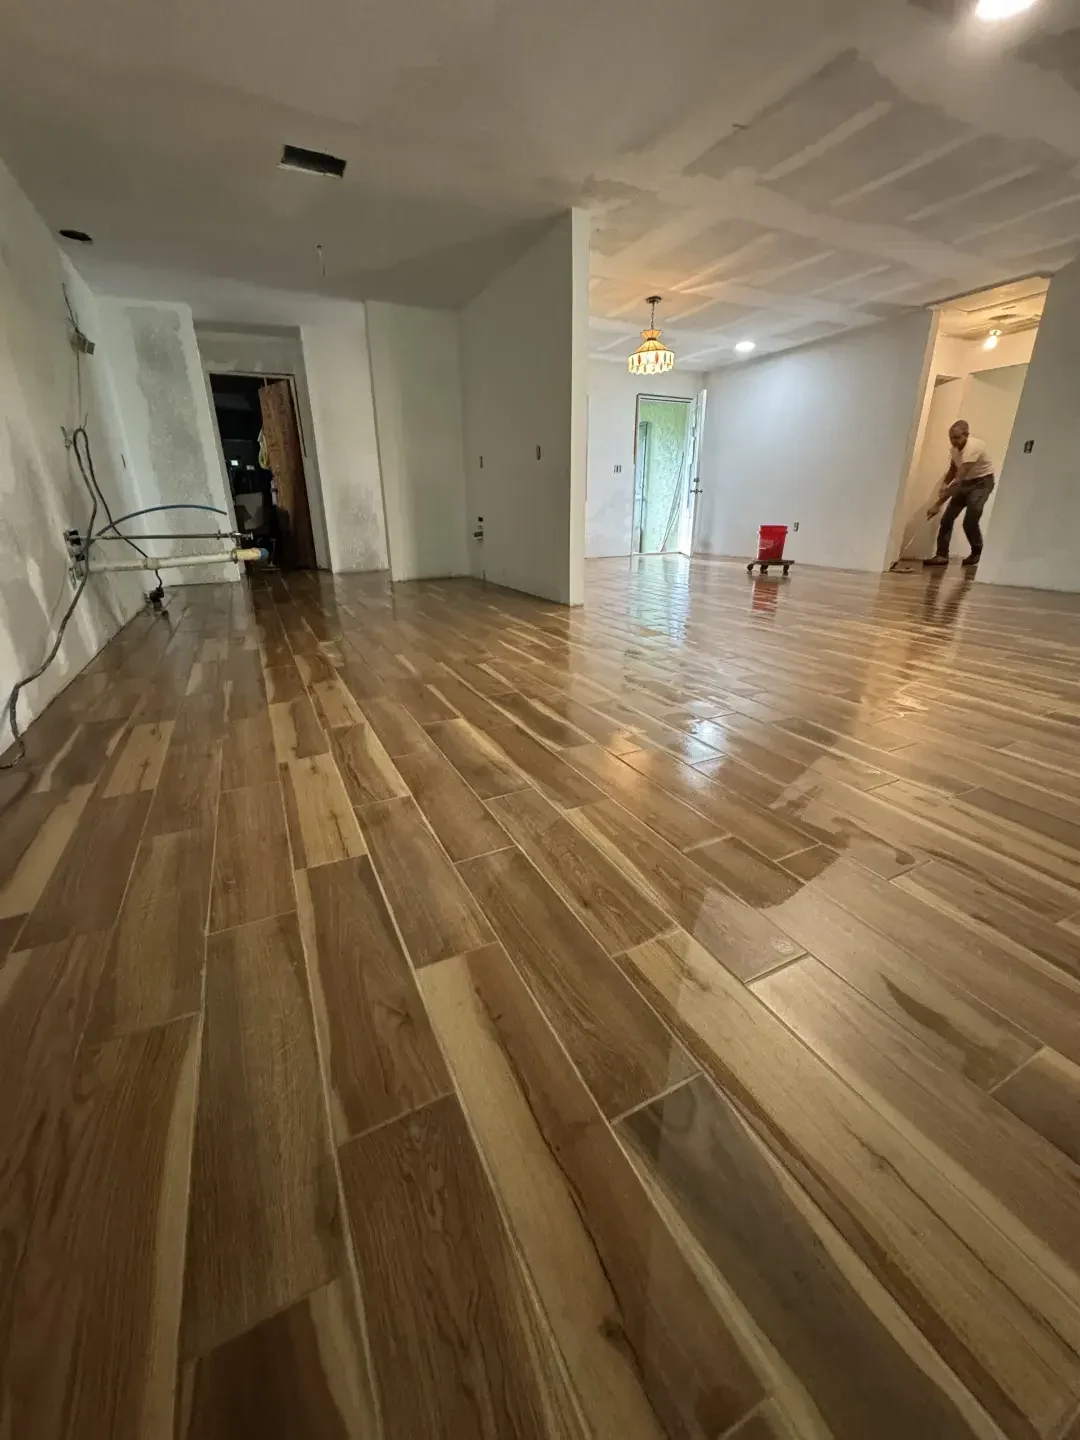

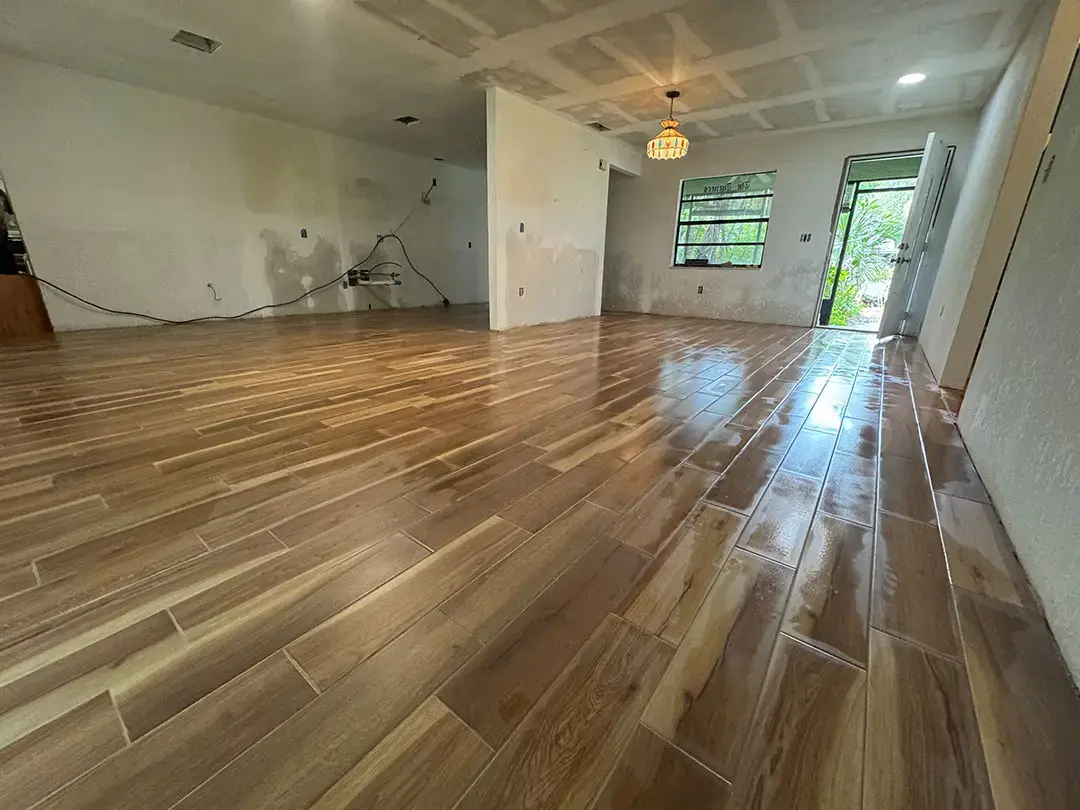
A flooring renovation can dramatically change the appearance of a home, particularly when new materials connect several living areas through a consistent design. For this residential project in Pinellas Park, FL, we installed approximately 750 square feet of wood-look tile, combining the natural appearance associated with wood floor installation and the durability of porcelain-style flooring. As an experienced tile contractor, we focused on careful surface preparation, precise plank placement, consistent spacing, and detailed finishing to create a beautiful and functional interior.
These homeowners chose a wood-look tile in a very rich brown color with lots of detail in the grain and color variation. The tile has brought a lot of warmth and character to their space while being able to withstand the Florida weather and lots of activity in their everyday lives.
Preparing the Existing Floor for New Tile Installation
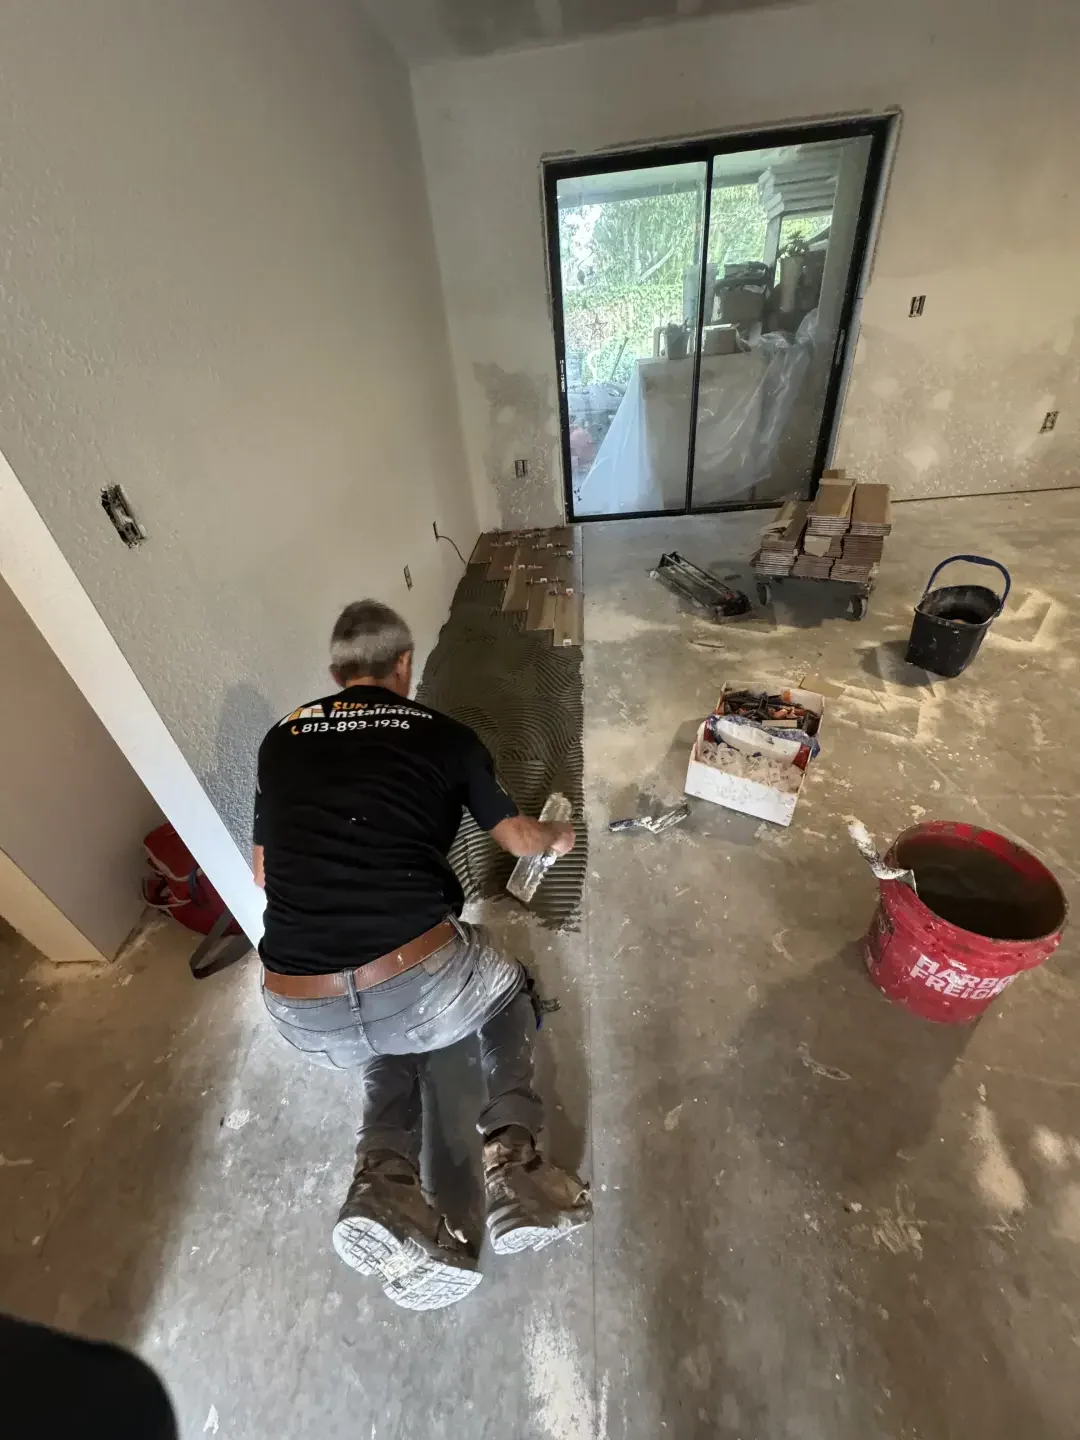
Key to any successful flooring project is the surface it is to be fixed to. In preparation for the new tile, we carried out preparatory work on the existing concrete substrate to form a solid base for the flooring to be installed. Prior to applying the mortar to fix the new tiles, we examined the area to be covered and treated as necessary before applying the flooring.
Florida homes are often built with concrete slabs, but these slabs can develop idiosyncrasies that will impact tile installation. Small variations in a slab can become very apparent when installing elongated plank tiles over large areas. To minimize the impact of uneven tile edges and facilitate installation, it is critical to properly prepare the slab.
Establishing a Reliable Foundation
Our preparation of the floors prior to laying of materials included the clearing of debris to produce a clean surface to lay upon. Attention was also paid to areas proximate to walls, doorways, and adjacent areas which experience changes in floor level or have different surface characteristics.
The project photos were taken as the installation progressed over the prepared concrete floor slab. The mortar was applied to each board prior to placement on the slab. This attention to the floor surface prior to installation ensured a stable floor surface and a quality finish.
Planning the Layout Across 750 Square Feet
When installing wood-look tile, it is crucial to properly plan out the layout of the approximate 750 square feet of tile. Rectangular wood-look planks of tile create lines in a specific direction and greatly impact how a room will look when complete.
We calculated the dimensions of the room and of the adjacent areas in order to define the best layout within the open interior of the home. We have tried to give the room a continuous look while keeping an adequate distance between the elements and avoiding ugly cuts on visible edges.
Creating a Natural Wood Appearance
These tiles have realistic wood grain prints in various browns with some gold tones. Rather than repeating the same tile in a monotone sequence, the tiles have been laid to create a natural appearance similar to that of a real hardwood floor.
To reveal the length of the planks and to allow an effective distribution of grout joints on the floor, a staggered laying pattern was chosen. The joining of the planks was carried out in consideration of the manufacturer’s recommendations for joining offsets in order to prevent lippage as far as possible.
The completed design creates movement throughout the space and does not overwhelm the surrounding architecture.
Installing Wood-Look Tile With Precision
Installation of the tile followed the established layout using appropriate materials and methods of placement. Each plank of tile was placed to ensure alignment, correct mortar coverage, and even spacing.
Care needs to be taken when laying wood-look tiles due to their rectangular shape, as any irregularities will be more noticeable than with smaller tiles. Strutting the floor to maintain straight lines between rows will help create a cohesive appearance to the completed floor.
Accurate Cuts and Consistent Spacing
The perimeter of walls, corners, and features were cut on this project. Individual tiles were measured and cut in order to maintain the layout whilst completing the perimeter of features such as walls, etc.
Consistent grout joints were equally important. Proper spacing allows the tile installation to maintain a balanced appearance while accommodating the grout and movement provisions required by the installation system.
We checked the placement of all components throughout the project to ensure the correct alignment to maintain the wood-look pattern.
Completing the Grouting and Final Cleanup
We then moved on to the grouting of the tiles. The grouting will complete the appearance of the finished floor, and the color and consistency of the grouting will define how individual planks relate to one another.
For wood-look tile, it is important to select a grout that will enhance the natural-looking wood grain and not create excessive contrast between individual tiles.
The grout joints were finished, all installation residue was removed, and the area was cleaned up. The finished floor looks great and showcases the warm, wood-like colors of this open living area.
Why Wood-Look Tile Works Well in Florida Homes
Wood-look tile provides an alternative for homeowners who appreciate hardwood aesthetics but prefer a material with greater resistance to moisture.
As opposed to natural hardwood flooring, porcelain wood-look tile does not expand and contract with changes in humidity. This makes it a very practical flooring option for homes in Florida, as changes in moisture and indoor climate are major factors when choosing a floor.
The material is also durable, easy to clean, and wear-resistant. Its performance, however, largely depends on the appropriate installation of the chosen tiles with the correct surface finish for the rooms they are to be used in.
The finished floor for this Pinellas Park home renovation project is a high-quality, natural wood grain finish, installed as a tile product, to create a beautiful finished floor throughout the home. The finished floor covers approximately 750 square feet.
Frequently Asked Questions
Is wood-look tile better than hardwood flooring for Florida homes?
As an alternative to real hardwood, wood-look tile has many benefits, such as providing moisture protection and greater dimensional stability. However, there’s no feeling quite like real hardwood under your feet, plus the potential to refinish it. Ultimately, it will depend on the homeowner in question and how they rank factors like personal preference, room use, maintenance, and cost.
How long does it take to install 750 square feet of wood-look tile?
Installation time depends on substrate conditions, tile dimensions, layout complexity, and required preparation. A project covering approximately 750 square feet may take several days, with additional time needed for grouting and curing. A professional contractor can provide a more accurate schedule after inspecting the property.
Does wood-look tile require special maintenance?
Generally, wood-look tiles need to be swept and cleaned on a regular basis with a mop and approved cleaning agents for the tile and grout. Spills need to be cleaned as soon as possible, and you should avoid using abrasive cleaning methods. Grout maintenance requirements will depend on the grout chosen and the installation conditions.
Why should homeowners hire a professional tile contractor for wood-look tile installation?
A professional tile contractor understands the specifics of a job such as substrate preparation, correct mortar application, plank laying, correct grout spacing and accurate cutting. This is especially important for rectangular tiles, which can look uneven if the surface or placement is not 100% correct and not perform as required.
Transform Your Home With Professional Wood-Look Tile Installation
This Pinellas Park, FL, home showcases approximately 750 square feet of wood-look tile that was expertly installed throughout the home to create a cohesive and sophisticated interior. The beautiful wood-look tile flooring takes advantage of the aesthetics of a wood floor installation while benefiting from the durability of tile to stand up to the demands of the home.
As a professional tile contractor, we take pride in every stage of our work, from surface preparation and layout planning to accurate cuts, grouting, and final cleanup. Whether you are replacing outdated flooring or considering wood-look tile for a larger renovation, we are ready to help. Contact Sun Floor Installation today to discuss your project and let us create a beautiful, durable floor that complements your home.
If you would like to know who will be working in your home, you can learn more about our team and our hands-on approach to every flooring project.